
For the first gif, my plan was to be make a gif with alternating patterns based on the brush I created for the first assignment. I intended to create a series of the finger print patterns with enlarging scales. So each new finger print pattern shown on the new frame would be larger than the previous ones. In addition, both the background color and the color of the finger print would reverse compared to the previous frame. Thus, there were alternation of color in both background and foot prints. The pattern in the previous frame would be the same color as the next background, and vice versa. My plan in the change of scale worked well, so there was the effect of stepping up and leaving finger prints. However, the alternation of color was difficult in workshop because every time when I switch color, Photoshop was not giving me the accurate reversal color I needed. So on the second and forth frame of the gif, the pattern on the right bottom is visible when it is not supposed to be.
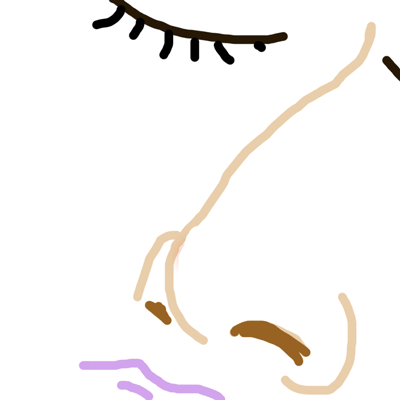
For the second gif, my plan was to make a gif of a pimple popping disaster. The gif is supposed to have a random pattern of blood flowing on the person’s face. I drew the image of the nose based on an image searched on google. It took me more time to make this gif than the first one because this one has more frames. I was considering the color of the nose and the nostrils so they would look both natural enough. I chose purple of the lips before the pimple popped out so the face looked more peaceful compared to the later disastrous face. I specifically chose this perspective of the face so it would be more unexpected. It also gives more attention to the nose compared to other parts of the face. It was difficult to draw the needle. I considered the brush tool, but I was not confident of drawing a perfect straight line and giving a sharp end. The line shape tool seemed to be a better option, but it still looked more of a thin rectangle than a needle. I enjoyed drawing the pimple the most. I used a larger brush with a blurred edge to draw a red dot and drew a smaller orange one on top of it. After all, I am happy with this humorous presentation of a disaster in daily life.
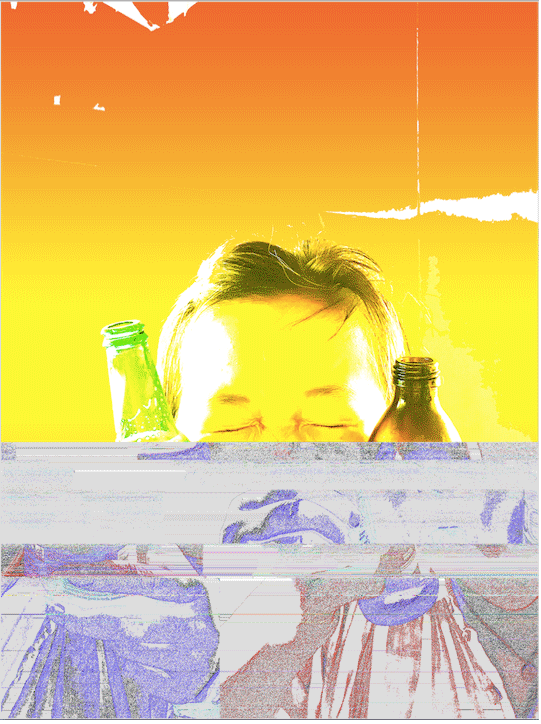
Finally, making glitch portraits was one of the most exciting experience in this class since I’ve enjoyed playing around with my self-portraits on some glitch photo making apps on my phone and listening to 8-bit music. I had never expected the theory of making a glitch art could be this simple. I did not really have a plan in my mind when I was glitching my portrait. In the process of glitching, I found some come patterns. Codes that are closer to the beginning of the file is describing the upper parts, and vice versa; longer codes contain more image information so when I edited with longer codes, more areas of the image were changed. I was having a hard time with glitching in jpeg format. I did not give me much effect as other file types. After I finished glitching some images, I selected eight of them for the gif. I arranged images with similar glitch methods separately. The final gifs change glitch from up to down repeatedly. I wished I could have added more glitch or pattern on the background too.


