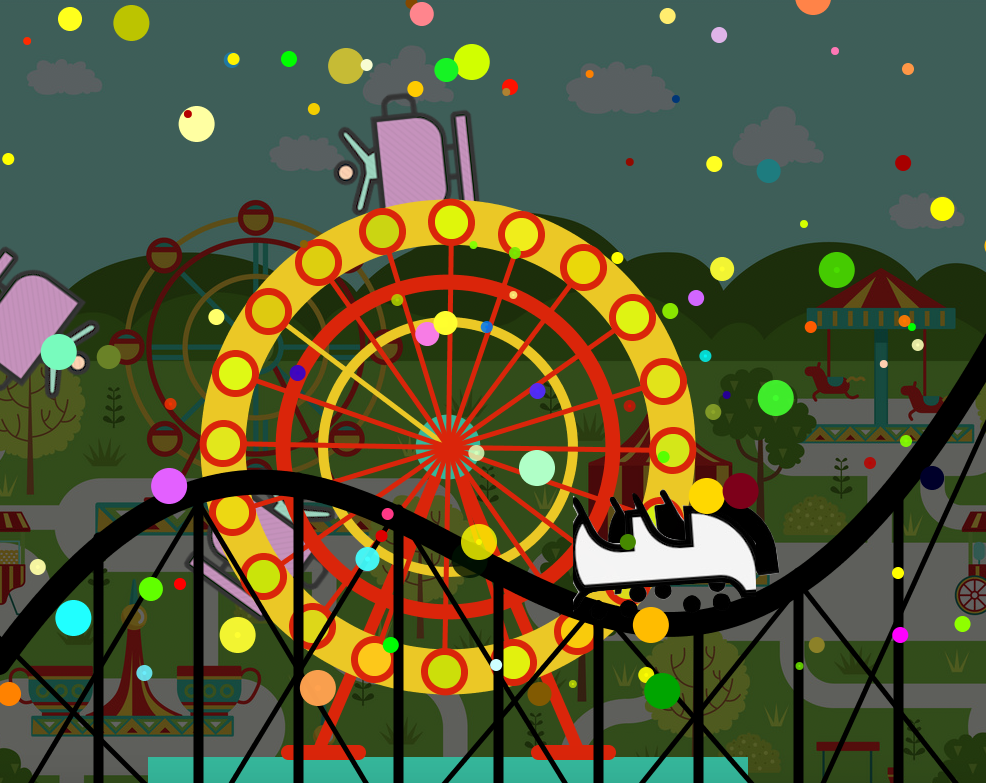
My final project of Art From Code is Amusement Park. I chose this as my final project because I was interested in the interactive check-in and I got inspired by the amusement park check-in that we did earlier in the year. I wanted to complete the amusement park by creating more rides and adding different interactive functions. For example, the balloon and teacup ride that I had already created in the amusement park check-in, a Ferris wheel ride, a roller coaster ride, and a light filter go across the screen. Each ride would be stored in different classes and could be called by using the main class function. Users can activate and deactivate each ride by using the keyPressed() function. Key “1” to key “9” is the rides turn on and off switch except Key “5” and “6”. They are the buttons to get a night view and day view. In addition to that, key “o” and key “f” activate the roller coaster cart.
Coming into making the rides, I constructed a main class that would call on each ride and five separate classes that have the ride’s functions. The name of the rides are all capitalized and they were named according to their functions. In each ride, I would have all the essential variables and stored them in that class so the ride could be referred to the main class. Then, I used checkEdges() and display() function. The checkEdges method would make sure all the rides stay in the range of the screen while the display method is similar to the void draw() method in the main class.
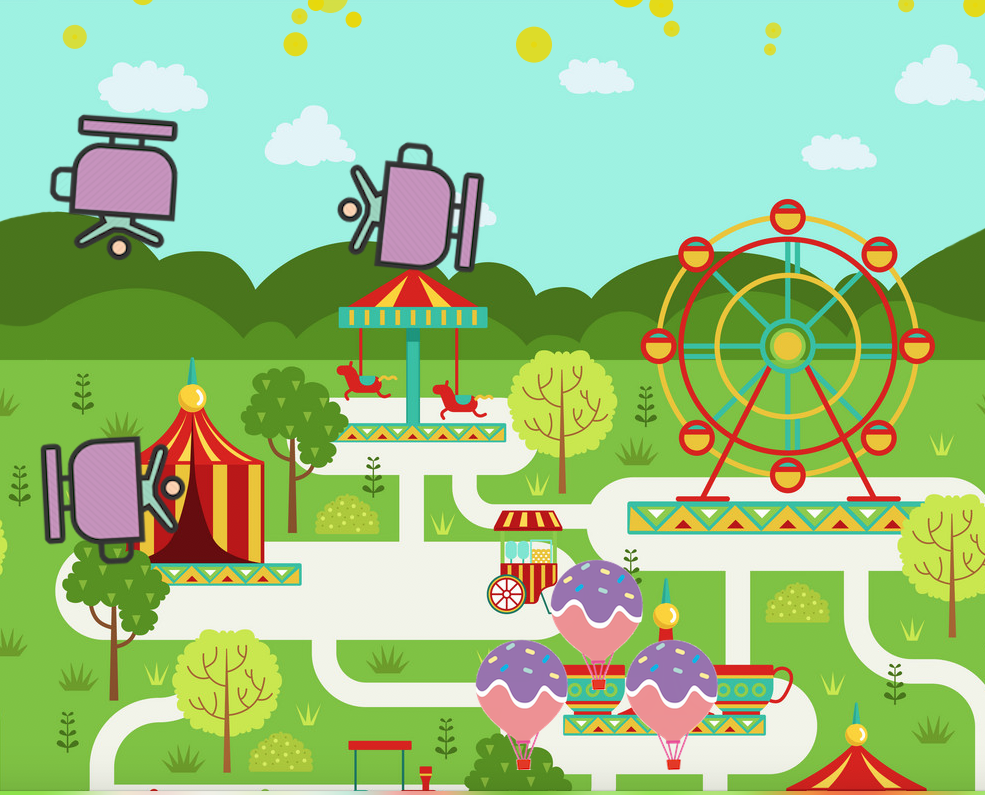
In the balloon and teacup classes, I translated the coordinates and rotated them with angle theta and increased theta by 1 so they could move across the screen. I initialized the coordinates of balloon from the top left corner and, by increasing x, y values, and theta, the balloon would go from top left corner to the bottom right corner. When the balloon is out of range, the checkEdges method would reset the x, y value back to the top left corner so the balloon would come back. The teacup class had a similar idea but they would rotate in a circular motion. I translated three teacups using three different coordinates so they would have a different start point. Then I set three angel variables, beta, theta and delta to 10,15 and 20. These angles were used in the rotate function and because they had a different rotating angle, teacups would move in a different circular motion.
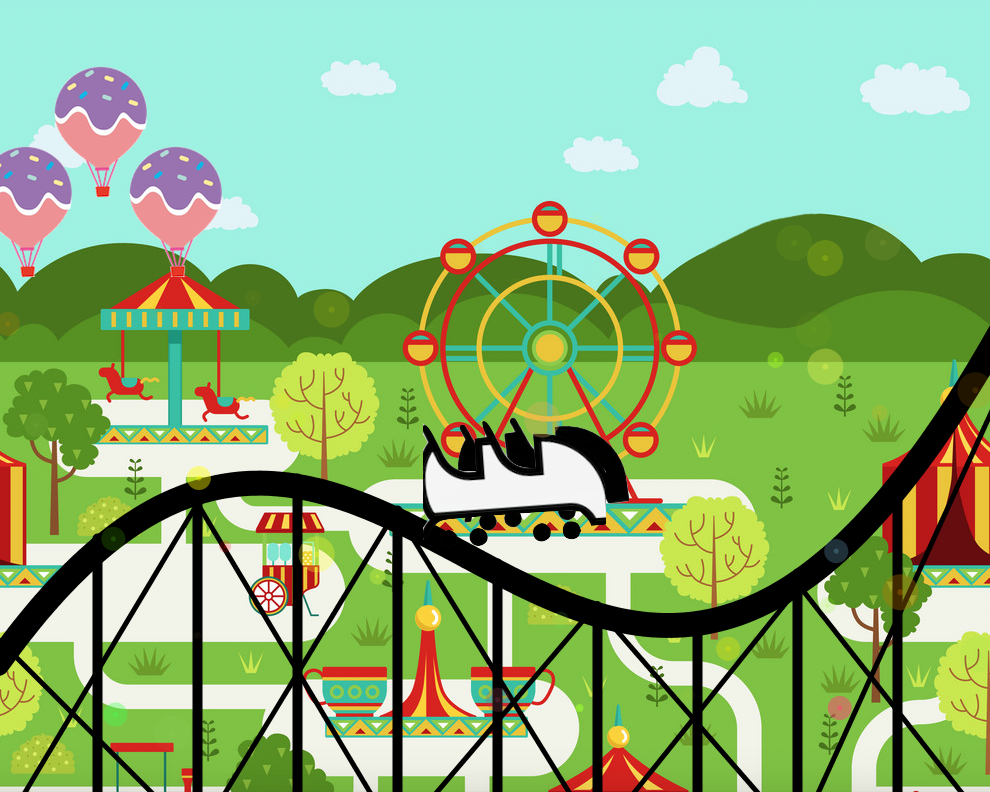
Making the rollercoaster class took a lot of time. Drawing the track of the roller coaster was time-consuming. The base of the roller coaster was constructed using line function but the track should be a curve. I chose to use the bezier curve function to draw the curve. The bezier curve has eight parameters representing four coordinates: one start point, two controlled points, and one endpoint. I set the starting point at the very left and put the two controls point one up and one down so the track would have two curves. Then, I set the endpoint at the upright side of the screen.
After I finished drawing the base, I wanted to add roller coaster carts and made them move along the curve I drew. I chose the bezier point and used the parameters I had for the bezier curve so that the cart object would move along the curve. The cart was slightly rotated to 20 degrees to fit the curve.
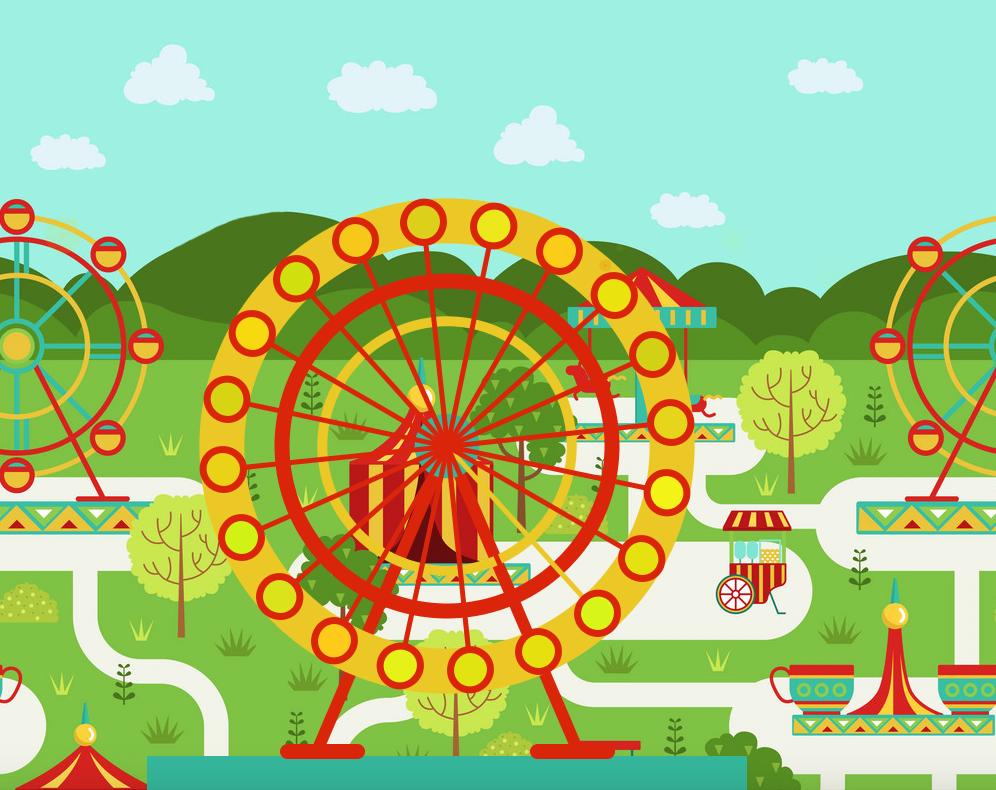
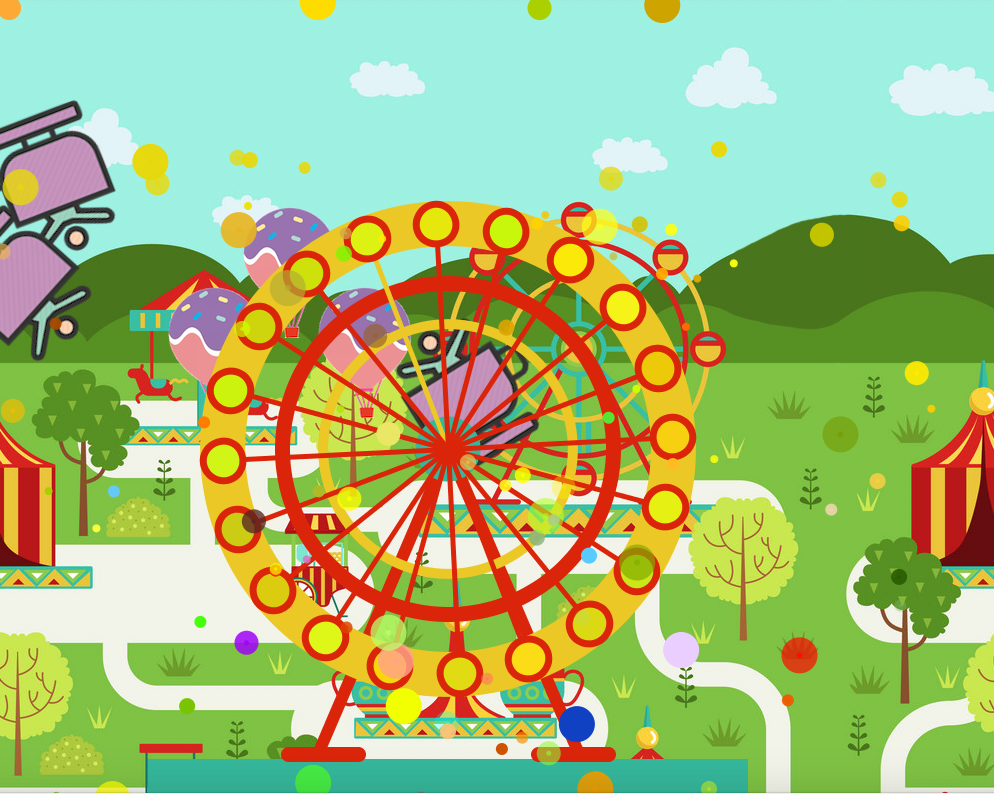
Besides, I also put a lot of time to draw the Ferris wheel so my Ferris wheel would have different layers of rings and I matched them to the color of the background. Filling the Ferris wheel cart with the random() function, the cart would look like having lights on the cart. To make the cart move in a circular motion, I used sin and cos for the x and y values and loop through the entire cart code. The Ferris wheel looks really good in the nigh mode. Because it has so many lights, it will be prettier at night views.
After I finished creating all the rides, I started to work on the interactive part. My goal was to use keyPressed() function to switch different amusement park rides class on and off so the user could play with the keys and created a different combination of keys.
To make the rides disappear, I set every stroke and fill functions with an additional variable alpha representing the transparency parameter. I initialized alpha to 255 to balloon, teacup, roller coaster, and light classes so users can interact with these rides when they first opened the program. Since I have images for some rides, I also implement a tint function and initialized alpha using the same idea. To make them interactive, the user can press keys so the alpha value would be switched from 255 to 0 and when alpha was equal to 0, the ride became transparent. Users can press keys from “0” to”9″ and “o” and “f” to select the rides they want on the screen. For example, when a user pressed “2”, the keyPressed function would be called and when the key is equal to 2, alpha in Ferris wheel class would be set to 0, so Ferris wheel would disappear. Users can also press “1” to reset the alpha back to 255 and get the Ferris wheel back.
Finally, I decided to move the background and added the soundtrack for the amusement park and roller coaster screams. I find a perfect soundtrack for the amusement park rides and a soundtrack for the roller coaster. The first one is the background sound and the soundtrack for a passing-by roller coaster can only be activated if key”o” is pressed.
In general, I’m pretty satisfied with my conference because it covers a lot of codes we learned in class including motion check-in, sound check-in, building check-in and so on. I had fun experimenting with these that I picked for this conference. As I have more than 10 interactive functions, it’s interesting to see different combinations of options. My favorite one is the night view with the Ferris wheel in the middle ground and the roller coaster and its cart in the foreground. In this version, the passing roller coaster sound blends into the background music.


