Gabriel Eng
To generate an idea of how I wanted to approach this assignment, I first glanced through the examples posted on the shared google drive. At first, it was just to figure out a template for my code but by the end, I had a pretty clear picture of what I wanted to create. I didn’t want to make a completely accurate portrait of my facial features, but rather make it a bit more abstract. This meant experimenting with unconventional shapes to create a basis for my facial structure and using different color schemes.
The first idea I had was to create a code that switched the facial expression through clicking the mousepad. Another was to create a portrait that cycled through multiple faces, with multiple facial expressions. Both of these influences derived from the examples posted on the google drive. They are the images shown below.
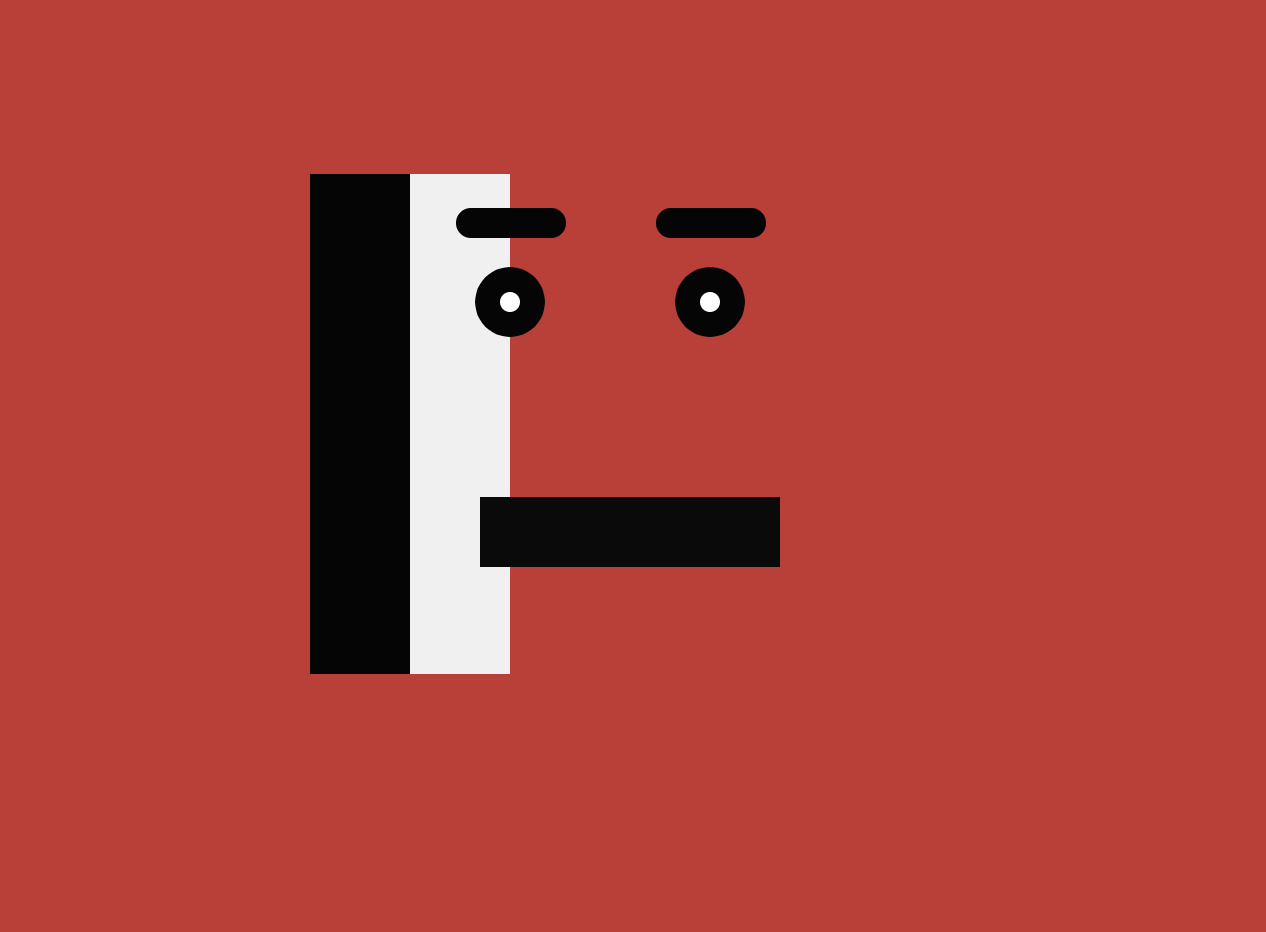
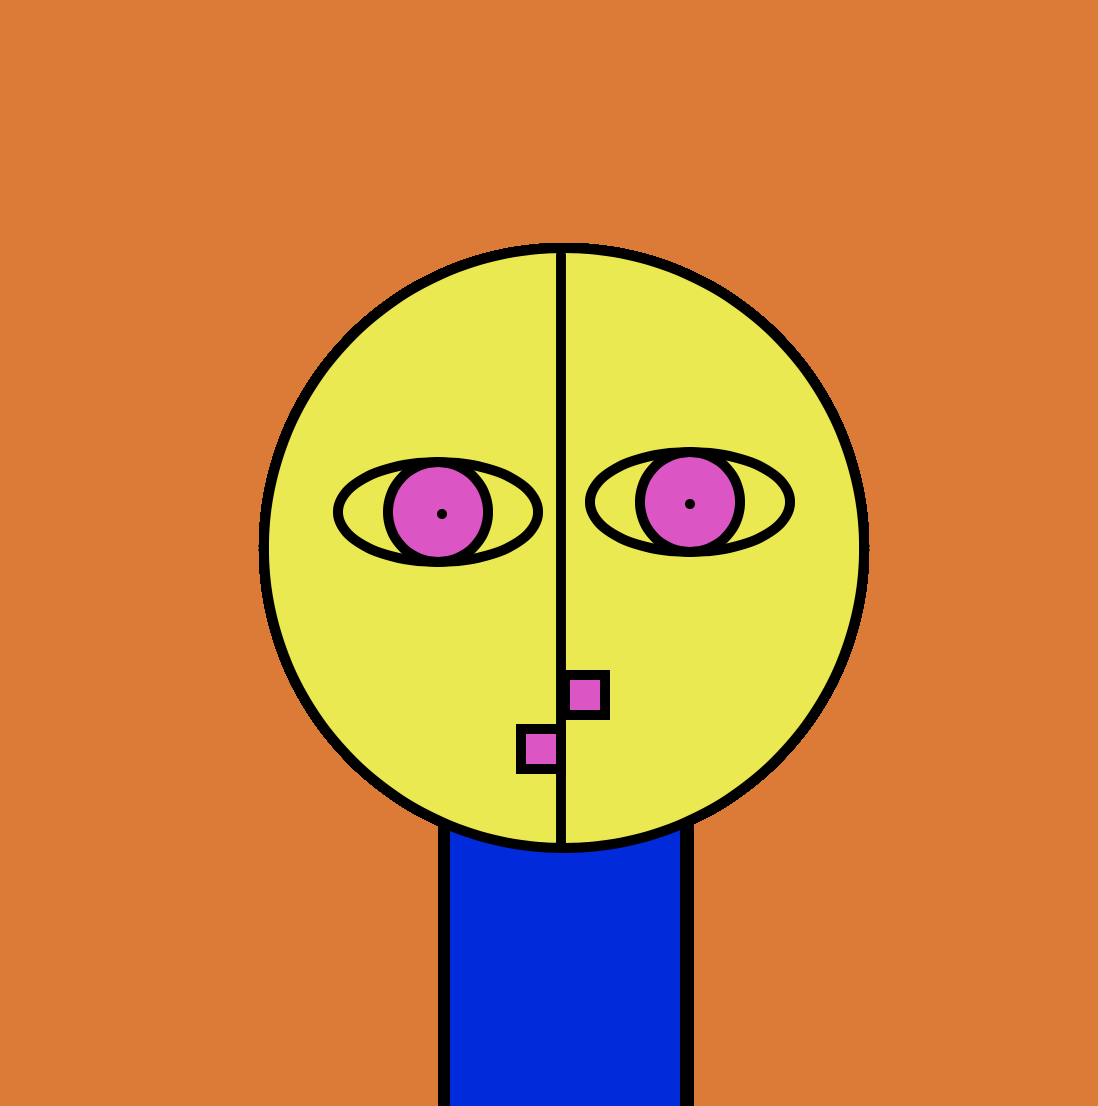
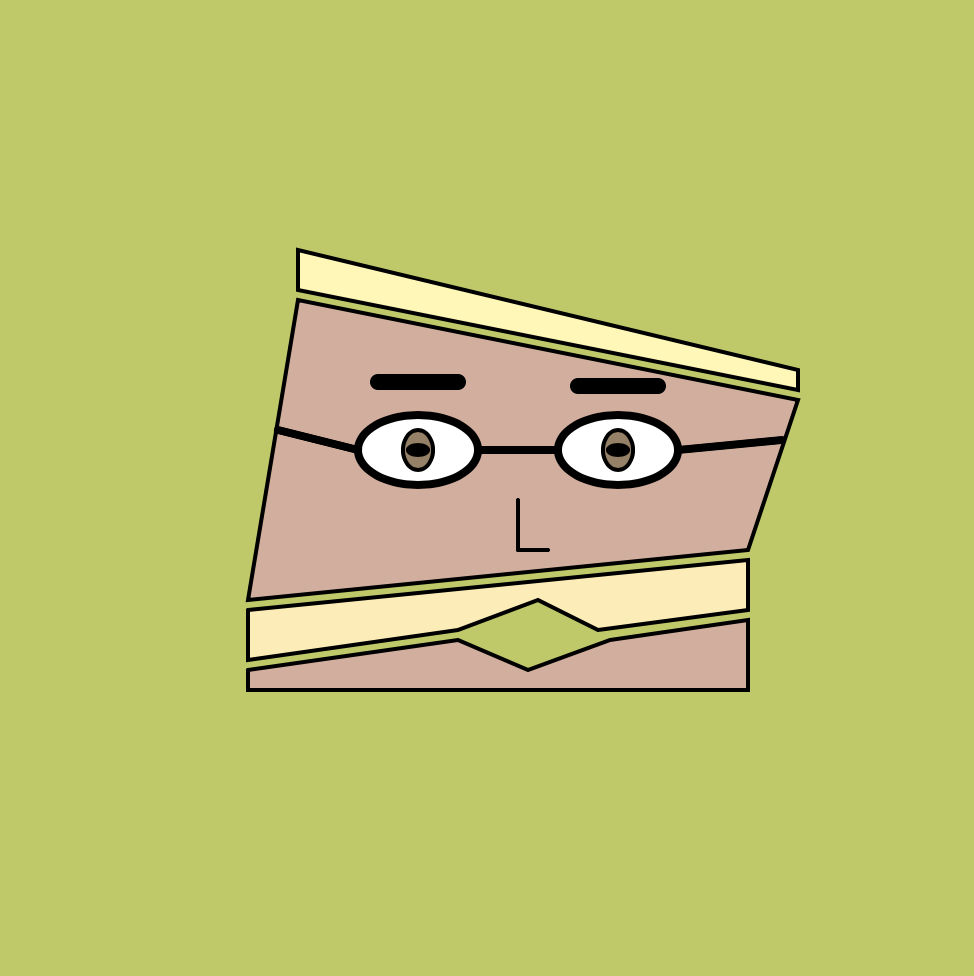
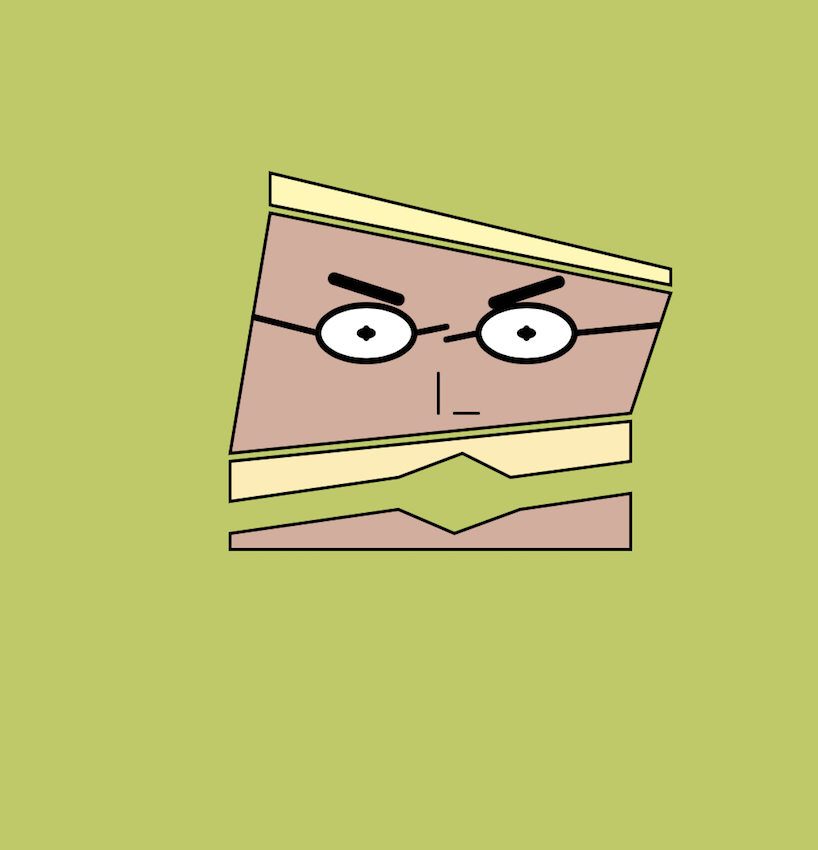
In the portrait on the left, the eye brows are raised and the eyes get bolder through the mousePressed function. I also like the lack of borders in the facial structure. What I found interesting from the portrait on the right was the split face and color scheme. I used that split face idea in my piece to create divided sections of the face, enhancing its abstraction. I don’t know the names of these artists or if they were past student work, but both portraits are very unique in their own right. From these portraits, I realized borders don’t necessarily need to be drawn out, the portrait can look more like a caricature or animation, and that even the slightest improvement, like making an outline bolder, can have a huge impact on the final output.
By making it interactive in this way, you can present a wide range of emotions or any representation, and create a more accurate depiction of yourself. With one picture you are limited in how you display yourself and one picture can not define a person. With multiple images appearing, you can exhibit more facial expressions or emphasize certain moods you may have. In my final portrait, I tried to show a clear change in expression that resembled aggravation, through the broken glasses and lowered eyebrows. You can also see how the lips separate and my idea was to go further and place text in between but I was having difficulty with adding that.
From this assignment, aside from the structure of the portrait, I gained a stronger appreciation for color schemes and their significance. Thats what catches my eye immediately when I look at other portraits. It makes it more interactive for the viewer because it gains attention. In past assignments I didn’t place much of an emphasis on the color scheme. I thought it was strictly about the image but from my self portrait, I realized how color schemes can drastically improve a piece. The lightness of the shades in the face go well with the light greenish background of the canvas.
What I also found useful for this assignment was the sketchbook. This is the first piece I’ve been using the sketchbook to create an outline or experiment with what I want to code. Before hand, I was making things up along the way. Obviously I still had ideas, but I never formulated them on to paper. Also, by sketching first, I had a smoother time finding the right coordinates to set my code at, and the comparable proportions of the various shapes.

