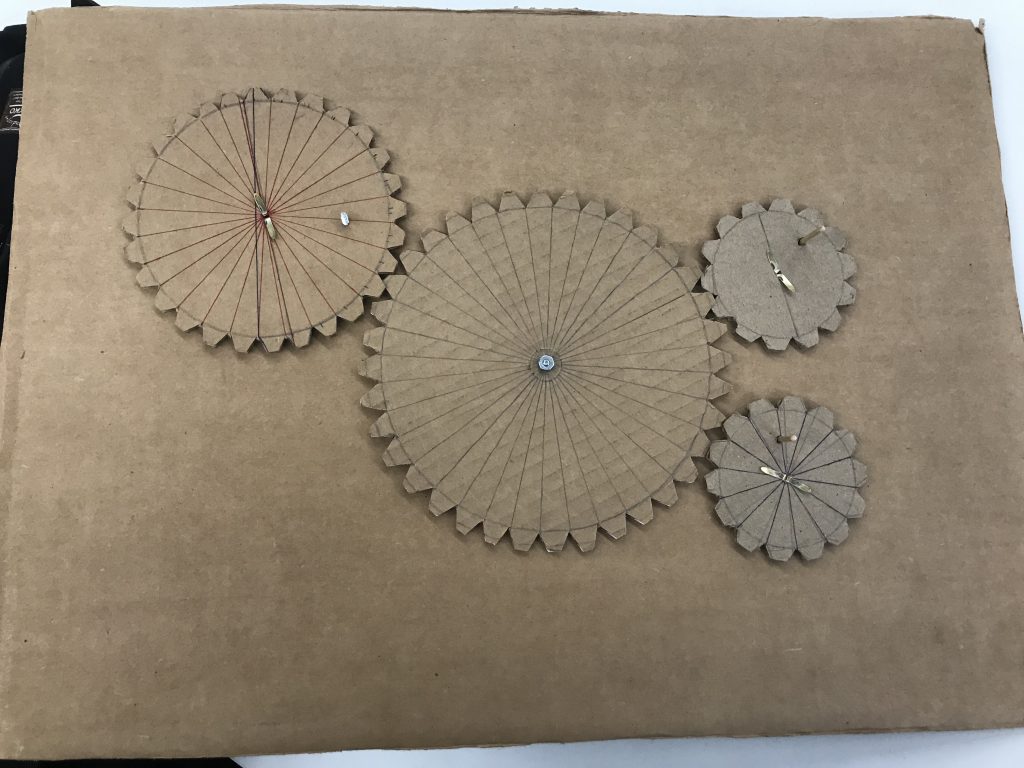
In the beginning I stuck to the example of Joe Freedman’s designs of a cycloid machine. My method was a sort of replication; I liked the structure, the satisfying and crisp results of the movement of the arms and the overall tranquility of his projects. For materials, I stuck with what I had at hand, a lot of cardboard and screws. The end result was a bit frustrating, although the work to get there was surprisingly satisfying. It took a long time to cut and teeth the gears, especially guestimating equal angles without a protractor, but I managed. What resulted was a semi-functioning cycloid, the gears were too flimsy and didn’t align properly though it could swing a few smooth rotations the joy did not last.
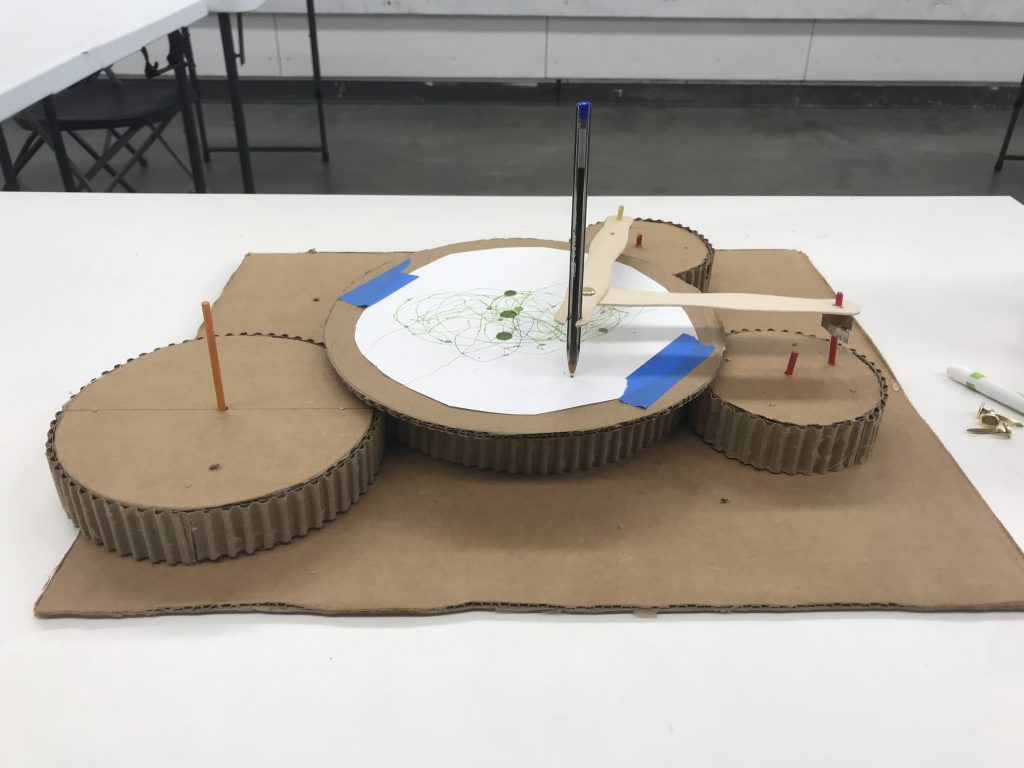
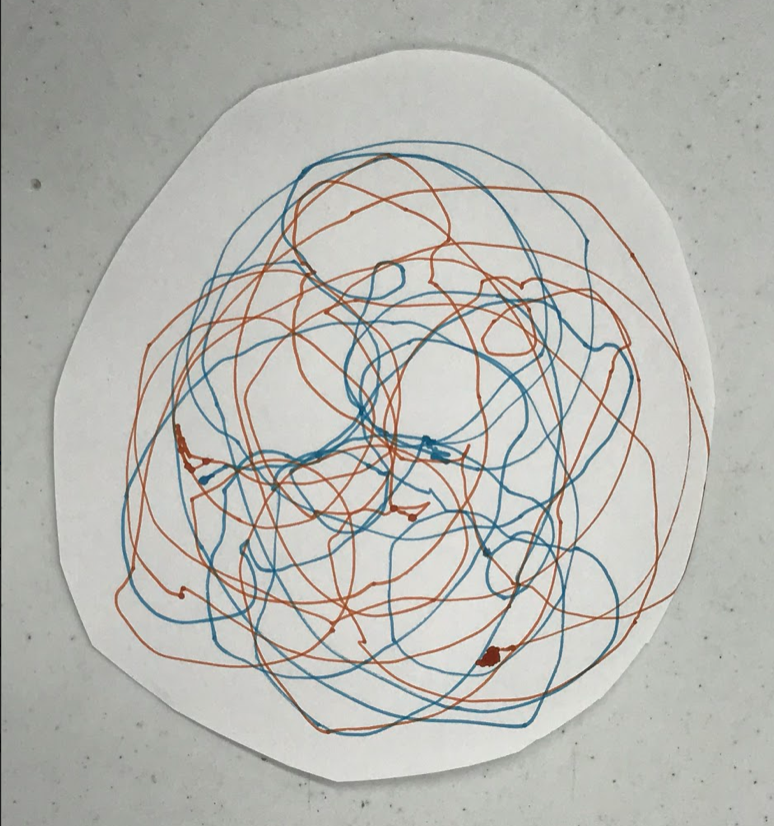
For my next machine I thought I’d branch out and do the recommended 3-D cardboard-gear technique. In my search for a stronger cardboard I found that Amazon packaging (salvaged from beside the Andrews House bins, thank you random person) was surprisingly durable and easily peeled to get the ridged inside used for the teeth of the gears. To my surprise this worked pretty well and I was able to attach all the necessary accoutrements to produce an actual drawing. The drawing itself, as you can see in the picture, is pretty all over the place but an expression of the young machine nonetheless. The problem here became securing the gears to their platform (I had been using only sticks that went through the platform and were secured with hot-glued feet to place the gears on) and to fine-tune the smoothness of the rotations.
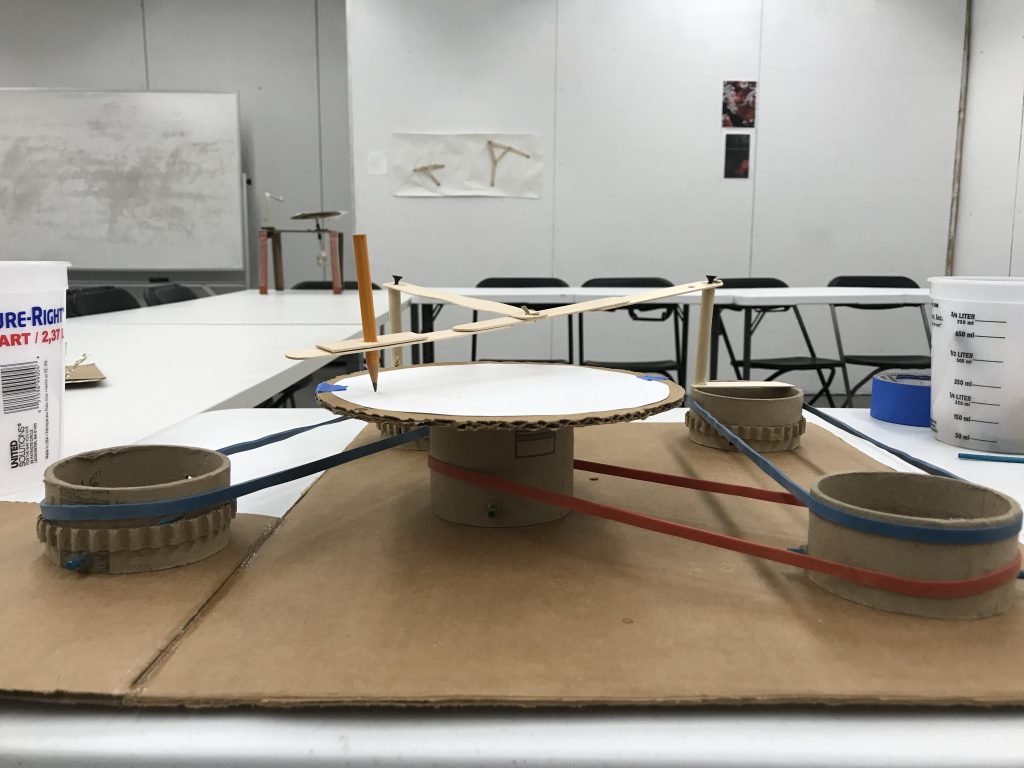
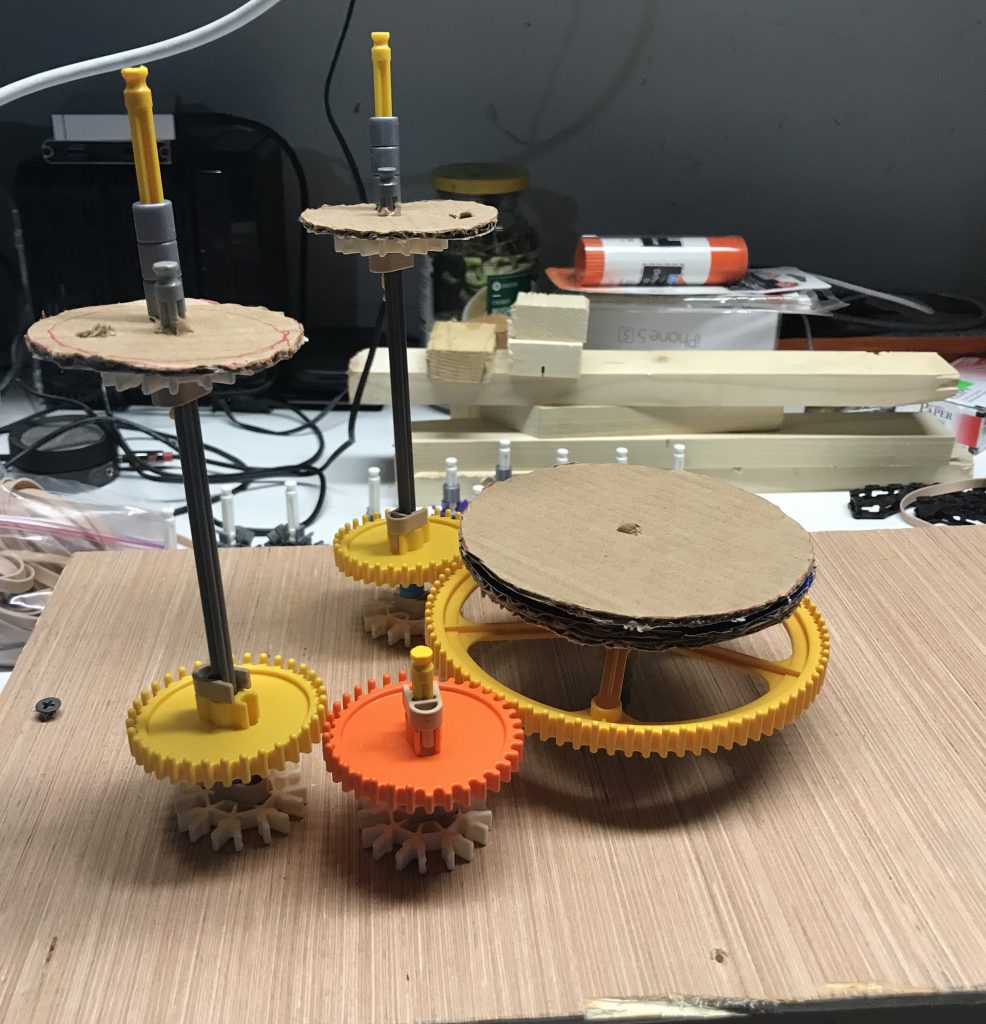
By far the most interesting and smoothest of the test machines was achieved with rubber band belts! In replacement of the gears I went wandering around Heimbold (not knowing if anywhere with a large garbage bin would actually be open as late as it was) and lo’ and behold the woodshop was not only open, but I knew someone working inside! We had a chat and when I mentioned what I needed and asked to take a gander through their throwaways someone popped in with a perfectly sized cardboard shipping tube, they even cut it down for me. Thank you, kind stranger. When I went back into my cave to put together my machine, I was able to better secure the tubes to their platform by threading a stick through the bottom of the tubes and latching split pins from under the platform to the sticks. As long as my latches held and didn’t allow the tubes to slide from side to side (I ended up holding the split pins in place on the sticks with hot-glue, the ultimate savior), it worked. You might notice that some of the tubes have the ribbed cardboard still on them, but those are not for regular gear purposes, rather with this setup there was a little bit of difficulty keeping the bands in place. My final product from this machine was also a bit wild, but from then I started to lean into that concept.
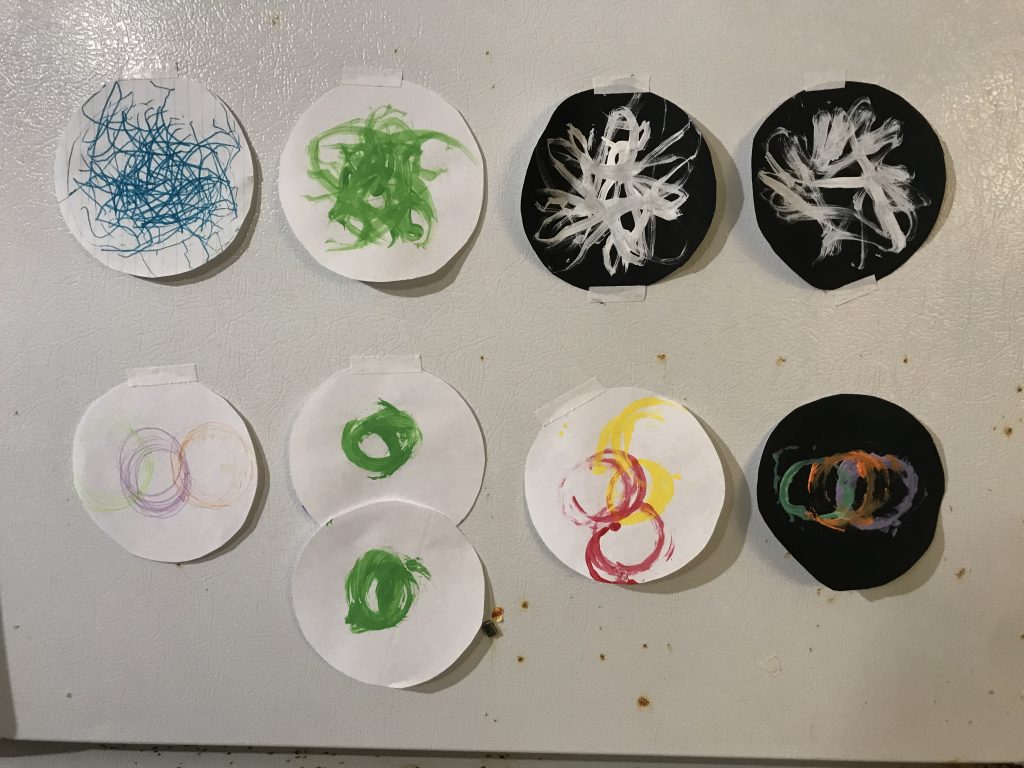
Shifting to work at home threw me off a little. There was a distinct lack of cardboard around the house, so I made due with the small bit I found in the garage and some old childhood relics that combined to make a hybrid of cardboard-K’nex. With the help of a battery powered motor I had hands free to monitor any bumps or mishaps the machine had while drawing, it was like working with a partner or maybe supervising a child so they didn’t get paint on their new shirt. But the disparity between the machine seen and the actual product was something from previous versions that I wanted to embrace. From something controlled spills chaos. And the process to get there was equally as ridiculous. It took longer than I’d like to admit to figure out that paint was a more conducive medium than a felted pen, but we got there in the end. [Final product is the top row of the last image.]

Finally, machine number 5. I went heavy on the k’nex attempting to do the complete opposite of my first experiment – all k’nex, no model just create something and make it draw. I wanted someone to look at it and go, “that thing paints?” If machine 4 was from order spills chaos, machine 5 is the sister machine in which from nonsense spills simplicity. Machine 5 draws very fast circles. Again, getting to the best option for this machine (paint) was also a long road as the mechanism that holds the drawing tool only allows for a very short pencil/pen/brush and it must be light to achieve the best rotation. Initially, I tried lead from a mechanical pencil, no dice. I then moved on to pulling the tips out of highlighters and strapping that to the spinning wheel, better dice. The next method was, obviously, to make my own (very rough) paintbrush. Cutting into a strip of paper, the cuts very close together but not deep enough to sever the paper, then wrapping said paper around a nail, secured shoddily with tape, believe it or not, gave a decent result [last image, bottom row, second from the left]. But stepping back I had an epiphany for the best tool – q-tips. Light, capable of being cut, they were a huge improvement. Art projects really are epiphany after fail, after fail, after sudden realization. Pretty fun.